
What Is Bubble Wrap and How Do You Use It?
Last updated: 11 August 2026 • 4 min readBubble wrap, the stuff everyone loves to pop, is the most widely used protective material for both moving and storage. But is it being used correctly? Honestly, most of the time, no. The scene we see most often on the job: bubbles facing out, a single layer, tape stuck directly onto the vase. The wrap is there, but the protection isn't. Below, we explain everything from which side faces in to how many layers to use, short and simple.
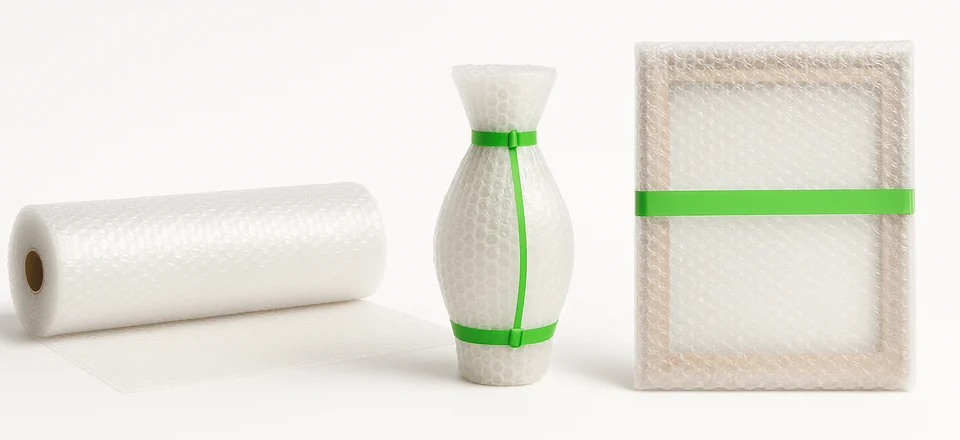
Key Takeaways
- The bubble side faces the item; wrap it the wrong way and you lose most of the protection.
- What protects isn't the plastic, but the air inside the bubbles.
- 3 layers for glass, porcelain and electronics; 2 layers are enough for ordinary fragile items.
- Large surfaces of wood and leather furniture aren't covered, because moisture gets trapped underneath.
- If the empty space inside the box isn't filled, even a wrapped item will take a hit.
What Is It and How Does It Work?
Air bubbles trapped between two layers of polyethylene; that's all there is to it. But keep this in mind: the protection doesn't come from the plastic, it comes from the air inside the bubbles. On impact, the air compresses and absorbs the energy. If the bubbles have popped, all you're left with is a thin sheet of plastic.
Which Side Faces In?
This is the most common mistake. The bubble side should face the item. There are two reasons. First, that way the air cushions sit between the item and any outside impact; that's how the system works. Second, with the flat side facing out, tape sticks properly and the wrapping doesn't come apart in the truck.
What Items Is It Used For?
| Item | How to use |
|---|---|
| Glass, porcelain, ceramics | Individually, 3 layers |
| Paintings and mirrors | Extra on the corners, 2 layers on the surface |
| Electronic devices | 3 layers if there's no original box |
| Lamps, chandeliers | Take apart and wrap piece by piece |
| Furniture corners | Corner protection only |
| Wooden furniture body | Not used; it needs to breathe |
Don't cover wood and leather surfaces in plastic from end to end; moisture builds up underneath and ruins the finish. The right way is explained in our article on furniture storage.
The Right Wrapping Technique
- Place the item on a flat surface, in the middle of the bubble wrap.
- Wrap it with the bubble side facing in.
- Add an extra layer on corners and protruding parts; that's where breakage always starts.
- Secure it with tape, but make sure the tape sticks to the wrap, not the item.
- After placing it in the box, fill the remaining gaps with bubble wrap or paper.
Leaving gaps is as serious a mistake as wrapping it wrong. An item that shifts around inside the box will take the impact, even if it's wrapped in three layers.
4 Common Mistakes
Wrapping it inside out: with the bubbles on the outside, most of the protection is lost. Settling for a single layer: one layer isn't enough for glass and porcelain. Sticking tape onto the item: it leaves marks on polished and painted surfaces that won't come off months later. And not filling the gaps in the box: items that move around break. Four mistakes, and each one can be avoided in a minute.
Alternatives and Complements
Bubble wrap alone can't do every job. Packing paper protects against scratches and goes between glasses and plates; details are in our article on packing glass and fragile items. Stretch wrap is for securing items and keeping dust out; we explain how to wrap with it in our article on how to use stretch wrap. Moving blankets protect large surfaces from scratches. If you'd like to see them all side by side: helpful moving supplies.
How to Choose the Bubble Size
Bubble wrap doesn't come in one size, and the wrong size won't protect.
- Small bubbles (10 mm): Light, delicate things like glasses, figurines and small electronics. Thin protection, little volume.
- Medium bubbles (20 mm): General use; plates, frames, kitchenware.
- Large bubbles (30 mm and up): Furniture corners, home appliances. Anything heavy and large.
There's no point wrapping a refrigerator in small-bubble wrap; the bubbles get crushed during the first loading and there's no air cushion left.
Can It Be Reused?
Yes, if the bubbles haven't popped. If you unwrap it carefully and roll it back up, you can use it a second or even a third time. Popped sections are useless; cut them off and throw them away. Keeping the bubble wrap from items coming out of storage lowers your materials cost on your next move.
An Extra Note on Storage
For items staying in storage for months, moisture can build up under bubble wrap. After wrapping fragile items and putting them in a box, toss a moisture absorber into the box; a small precaution that makes a big difference. The whole topic is covered in our article on humidity, mold and pests in storage.
If you'd rather leave the packing to our team, you can reach us at 0850 888 66 15 or through the quote form.
Frequently Asked Questions
Which side of bubble wrap should face the item?
Wrap it with the bubble side facing the item. That way the air cushions sit between the item and any outside impact; and because the flat side is on the outside, tape holds better too.
Are bubble wrap and stretch wrap the same thing?
No. Bubble wrap absorbs impact, while stretch wrap compresses and holds things in place. Use bubble wrap for fragile items and stretch wrap for securing furniture.
How many layers should I wrap?
2 layers are enough for ordinary fragile items; 3 layers for glass, porcelain and electronics. Covering corners and protruding parts well matters more than the number of layers.
Can bubble wrap be used on wooden furniture?
Don't wrap it directly around large surfaces; it keeps the wood from breathing and traps moisture. On wood, protect only the corners and cover the body with a breathable cover.

